Getting Started with Ververica Platform on Alibaba Cloud
In previous posts, we walked you through how to get Ververica Platform up and running in different public cloud providers such as Google Cloud Platform, Amazon Web Services and Microsoft Azure. This post describes the process to get Ververica Platform running on Alibaba Cloud, using its hosted Kubernetes solution, Container Service (CS).
Ververica Platform
Ververica Platform is an enterprise-ready, real-time stream processing platform that brings together open source Apache Flink and other useful components, making stateful application lifecycle management easy and frictionless. It is built on Kubernetes as the underlying resource manager, and thus supports a wide range of deployment scenarios: from all major cloud vendors and on-premise to hybrid-cloud deployments using Red Hat OpenShift or vanilla Kubernetes.
Step 1: Kubernetes Cluster on Alibaba Cloud
Once you have created an Alibaba Cloud account, you first need to decide in which region you want to run your Kubernetes cluster. For me, this is eu-central-1. When you create your first K8s cluster on Alibaba Cloud, it will ask you to activate a couple of services.
We suggest activating the following services upfront:
-
Resource Access Management Service (RAM) https://ram.console.aliyun.com/
-
Resource Orchestration Service (ROS) https://ros.console.aliyun.com/
-
Logging Service (SLS) https://sls.console.aliyun.com/
-
Auto-Scaling Service (ESS) https://essnew.console.aliyun.com
In order to create a Kubernetes cluster with Alibaba Cloud’s Container Service, you need to first add a new SSH key pair and then assign the default roles to Container Service by following the instructions on the CS console page.

Select “Managed Kubernetes” and customize the cluster to your needs. Be sure to check “Expose API Server with EIP”, so that you can later connect to the cluster from your local machine. Beside this checkbox, you only need to set a name and change the region (eu-central-1) and instance type (ecs.c4.xlarge).
Spinning up the cluster will take a few minutes. Once the cluster is ready you will need to connect to it from your local machine with kubectl. This assumes you have kubectl installed on your local machine. You can access the required kubectl configuration in the CS console by clicking on “Manage” for the newly created cluster.
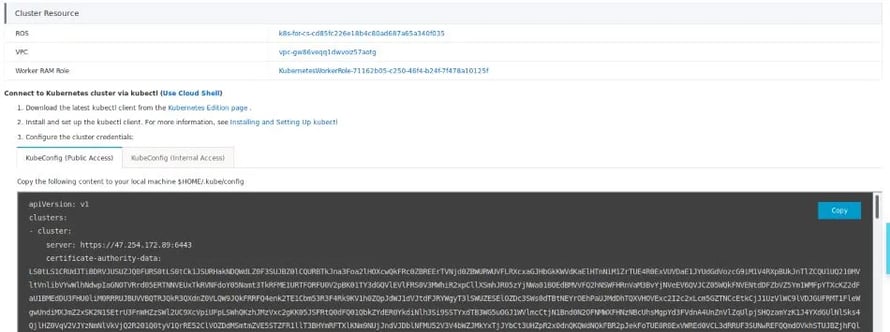
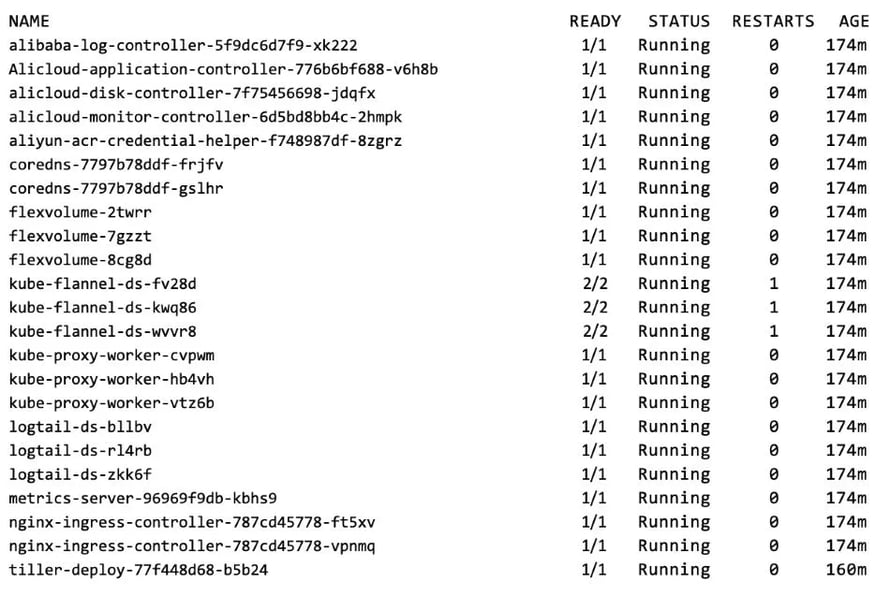
You can verify that the cluster is set up correctly by checking that all system pods are up & running.
$ kubectl get pods -n kube-system
The output should look similar to the following:
Step 2: Installing Ververica Platform
Ververica Platform is distributed as a helm chart archive and installed via helm. The server-side component of helm, called tiller, is already pre-installed, when your Kubernetes cluster was created. The next steps assume that you have installed the helm command line client on your local system (checkout the helm website for instructions). To verify, that helm is configured correctly run helm list. The output should be empty as nothing is installed yet. In case of a version mismatch between your local helm client and the server-side tiller you can upgrade tiller by running helm init --upgrade.
After downloading the current chart archive from the Ververica website, you need to create a small configuration file to pass to helm during installation.
values_override.yaml
enabled:
  loggingDemo: true
  metricsDemo: true
appmanager:
  persistentVolume:
    storageClass: alicloud-disk-ssd
    size: 20Gi
elasticsearch:
  persistentVolume:
    storageClass: alicloud-disk-ssd
    size: 20Gi
influxdb:
  persistence:
    storageClass: alicloud-disk-ssd
    size: 20Gi
Grafana:
  server:
    persistentVolume:
    storageClass: alicloud-disk-ssd
    size: 20Gi
This is necessary since Alibaba Cloud Container Service only supports volumes larger or equal to 20GB and does not define a default storage class. We can now install Ververica Platform via:
$ helm install --name ververica-platform --values values_override.yamldaplatform-dist-trial-1.4.0.tgz
If everything went well, you should only see healthy, running pods when executing:
$ kubectl get pods
similar to this:

To access Application Manager, Ververica Platform’s central orchestration and lifecycle management component, we’ll set up a port forward with kubectl.
For a permanent, production setup, we recommend setting up an Ingress or something else suitable for the environment.
Run the following commands for setting up the port forward:
$ POD_NAME=$(kubectl get pod -l
release=ververica-platform,component=appmanager -o
jsonpath='{.items[0].metadata.name}')
$ kubectl  port-forward $POD_NAME 8080
Application Manager is now available in http://localhost:8080/.
Step 3: Running Your First Flink Application
In this last section, you will deploy a Flink Application to your Kubernetes cluster with Application Manager. For this, you will simply use a Flink example, that is hosted on Maven Central. To create a new Deployment, open the Application Manager user interface, and click the “Create Deployment” button on the top right.
Fill the form with the following values:
-
Name: Enter any name
-
Deployment Target: Kubernetes
-
Upgrade Strategy: Stateless
-
Initial State: Cancelled
-
Restore Strategy: None
-
Parallelism: 1
-
FlinkVersion: 1.8
-
FlinkImageTag: 1.8.0-stream1-oss-scala_2.11
-
Jar URI
-
EntryClass: org.apache.flink.streaming.examples.windowing.TopSpeedWindowing
-
For JobManager and TaskManager CPU: 1
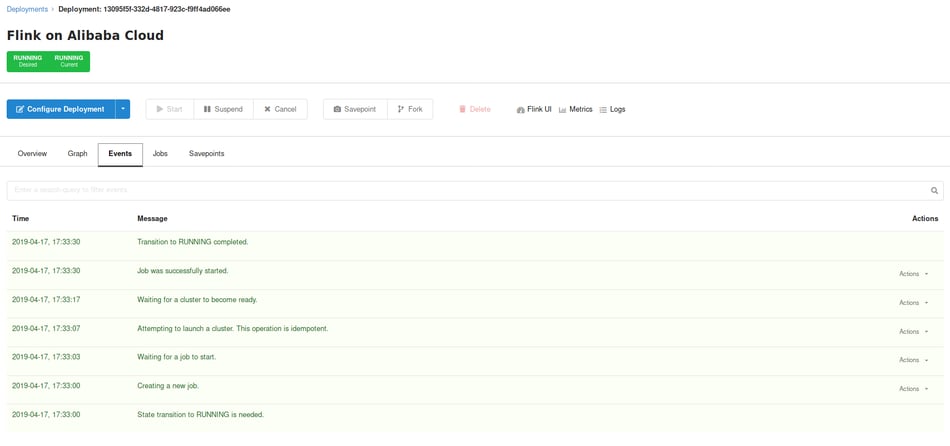
Finally, press the “Create Deployment” button, select the newly created Deployment from the list, and press “Start” to launch a Flink cluster on Kubernetes for the job.
As a last step, let’s configure the Deployment to store savepoints to Alibaba Cloud’s Object Storage Service (OSS). For this, go to the OSS Console and create a new bucket by clicking the small “+” in the sidebar. The default storage class and private access are sufficient for this purpose.

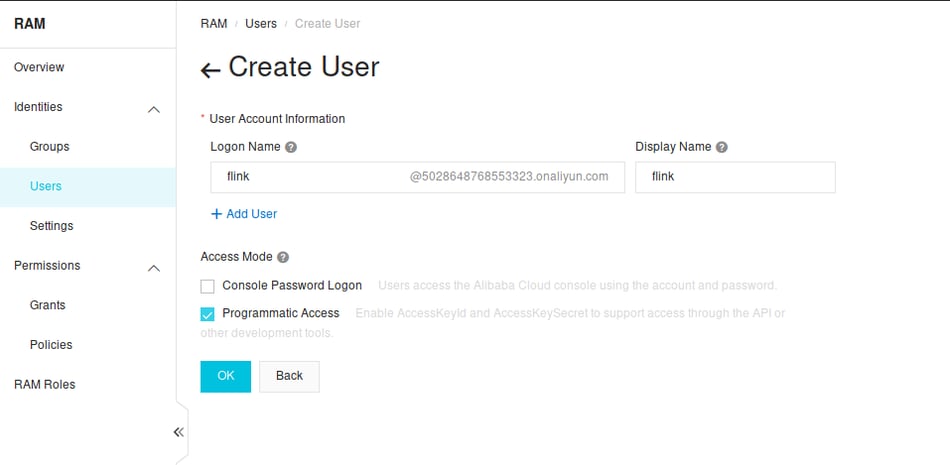
In order for your Flink job to have access to this bucket, you need to create a new user in the RAM (Resource & Access Management) console and give this user permissions to access this bucket. Make sure to give the user “Programmatic Access” and to note down the secret access key during user creation.
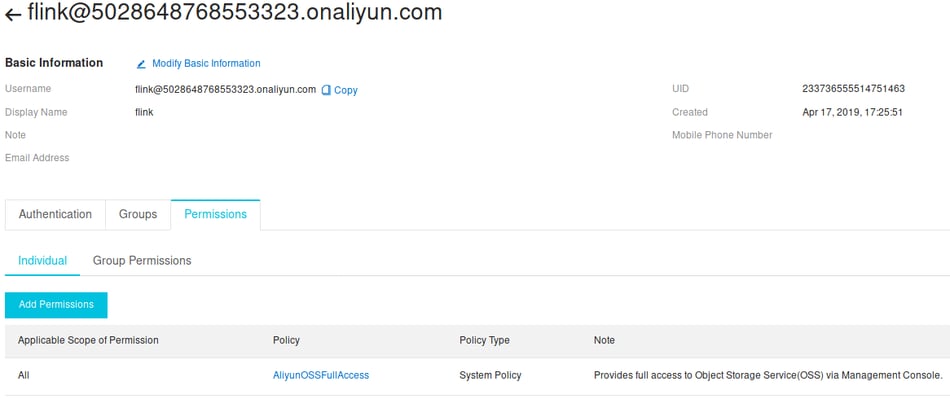
Once the user is created you can associate the “AliyunOSSFullAccess” policy with the newly created account (“Add Permissions”).
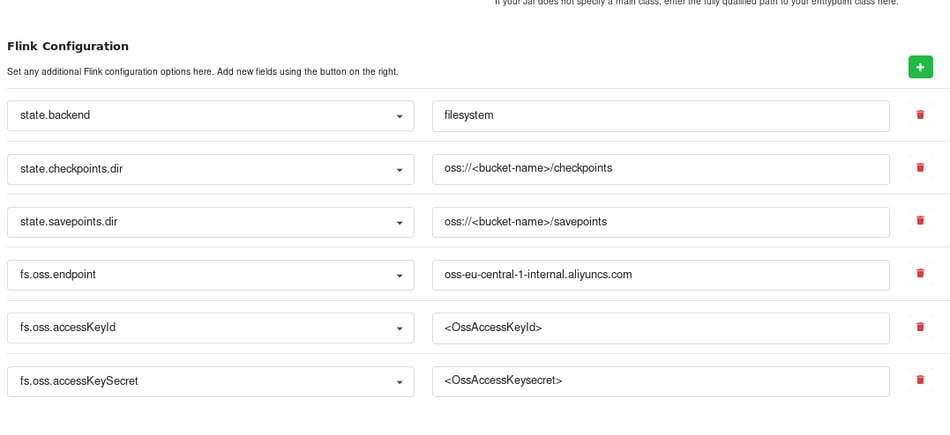
Now you are ready to upgrade our Application Manager Deployment for savepointing. For this, you need to add the following entries to the Flink configuration of your Deployment.
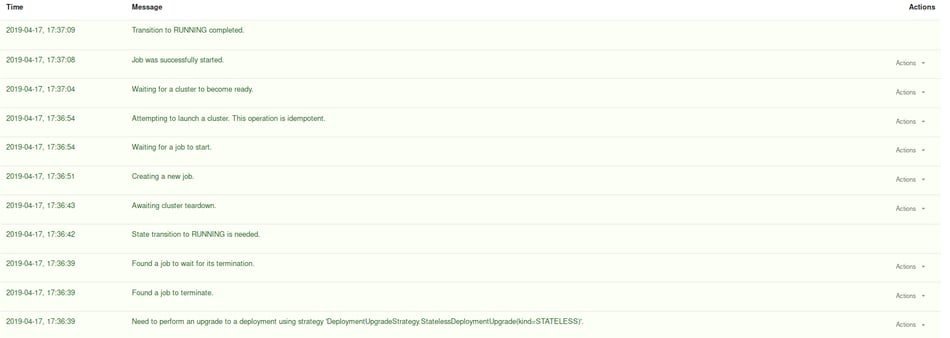
 This will trigger an upgrade of the Deployment by Application Manager according to the previously configured “Restart Strategy”.
To confirm that savepoints operate normally, you can manually trigger a savepoint through Application Manager.

In the “events”-tab we should see that the savepoint was successfully completed.

Next Steps
Check out the full Ververica Platform documentation, to learn what’s possible with Application Manager and start deploying, managing and debugging your Apache Flink applications in a few easy steps.
Do not hesitate to reach out to our team for feedback, questions or requests for larger trial licenses.

You may also like

Meet the Flink Forward Program Committee: A Q&A with Lorenzo Affetti
Meet Lorenzo Affetti, a Program Committee member for Flink Forward 2025, ...

Outrun Fraudsters with Agentic AI and Ververica
Enhance fraud detection with agentic AI and Ververica's real-time stream ...

KartShoppe: Real-Time Feature Engineering With Ververica
Discover how KartShoppe leverages Ververica’s real-time feature engineeri...
Maximize Efficiency: How Ververica's BYOC Deployment Optimizes CAPEX and OPEX
Learn how Ververica's BYOC deployment leverages CAPEX and OPEX to optimiz...


